Quick-Start Guide
Welcome to the quick-start guide! (Well, it’s more of a formal documentation)
We will go through and explain each element of framed_text, from simple frames to complex data structures and
progress bars!
More specifically, this guide will cover:
Important
Make sure to import the module first!
1from framed_text import FramedText, LabeledData, Status, ... # Any other items you need
Adding Frames around Text
The basic parameters for FramedText include:
framed_color: The color of the frametitle: The title of the frametitle_color: The color of the titleattrs: The attributes of the titletext: The text to display
We’ll go over each of these parameters in detail.
Creating a Simple Frame with Text
You can create a simple frame using the following code:
FramedText class1ft: FramedText = FramedText(
2 text=[
3 "Hello world"
4 ]
5)
6print(ft)

We can add more text by adding more strings to the text list:
text list1ft: FramedText = FramedText(
2 text=[
3 "Hello world",
4 "Another line",
5 "Another Another line"
6 ]
7)
8print(ft)

Styling the Frame and Adding a Title
You can color the frame using the framed_color parameter:
1ft: FramedText = FramedText(
2  frame_color="red",
3  text=[
4    "Hello world"
5  ]
6)
7print(ft)

You can add a title to the frame using the title parameter:
1ft: FramedText = FramedText(
2  title="This is a title",
3  frame_color="red",
4  text=[
5    "Hello world"
6  ]
7)
8print(ft)

To color the title, use title_color:
1ft: FramedText = FramedText(
2  title="This is a title",
3  frame_color="red",
4  title_color="green",
5  text=[
6    "Hello world"
7  ]
8)
9print(ft)

Changed in version 2026.06.18.15.00: attrs has been renamed to title_attrs
The title supports termcolor’s formatting options using title_attrs parameter:
 1ft: FramedText = FramedText(
 2  title="This is a title",
 3  frame_color="red",
 4  title_color="green",
 5  title_attrs=["bold", "underline"],
 6  text=[
 7    "Hello world"
 8  ]
 9)
10print(ft)

Advanced Parameters
In addition to the above parameters, FramedText also features:
cutoff: If true, will cut off text if it exceeds the terminal widthmode: Determines how text is cut off. Used withcutoffallow_ansi: If true, will allow ANSI codes to be displayed. By default, this is false for reasons we’ll get to.center_text: If true, will center thetextdisplay to the middle of the frame.
Added in version 2026.06.03.18.00:
frame_size: Determines how the frame is rendered. See frame_size for more information.
mode
Changed in version 2026.05.04.17.15: mode now applies to all str objects in the text parameter, not just LabeledData and Status objects.
mode can be one of the following:
"char": Cut off the line based on which character surpasses the terminal width"word": Cut off the line based on which character surpasses the terminal width"middle": Trim the middle of the line until it fits the terminal width
Below are examples of each mode:
mode is set to "char""The quick brown fox jumped ove…"
mode is set to "word""The quick brown fox jumped…"
mode is set to "middle""The quick brown…the lazy dog"
Note
LabeledData.Path behaves differently when mode is set to "word".
Parts of the path will be cut and replaced with an ellipsis if the path exceeds the limit:
"/home/user/path/to/a/file.txt"becomes"/home/user/path/…/file.text"
allow_ansi (Deprecated)
Deprecated since version 2026.06.18.15.00: allow_ansi has been removed. For ANSI support,
use Status or LabeledData
Because of this, any strings containing ANSI codes will have their codes removed! The only exceptions are
for the objects provided by framed_text (e.g. Status and LabeledData).
However, if you want to allow ANSI codes to be displayed, you can set allow_ansi to true.
frame_size
Added in version 2026.06.03.18.00.
This parameter controls how the frame is rendered. It has the following options:
"full": The default mode. Frame size is based on terminal width
 1ft: FramedText = FramedText(
 2    title="Frame Size",
 3    frame_color="blue",
 4    text=[
 5        "A plain string",
 6        LabeledData.String(
 7            label="LabeledData.String",
 8            value="A String value",
 9            suffix="with a suffix"
10        ),
11        Status.Info(msg="An info message"),
12    ]
13)
14print(ft)

"dynamic": Frame size is based on text length
 1ft: FramedText = FramedText(
 2    title="Frame Size",
 3    frame_color="blue",
 4    frame_size="dynamic",
 5    text=[
 6        "A plain string",
 7        LabeledData.String(
 8            label="LabeledData.String",
 9            value="A String value",
10            suffix="with a suffix"
11        ),
12        Status.Info(msg="An info message"),
13    ]
14)
15print(ft)

When using center_text in conjunction with "dynamic", the entire frame will be centered.
 1ft: FramedText = FramedText(
 2    title="Frame Size",
 3    frame_color="blue",
 4    center_text=True,
 5    frame_size="dynamic",
 6    text=[
 7        "A plain string",
 8        LabeledData.String(
 9            label="LabeledData.String",
10            value="A String value",
11            suffix="with a suffix"
12        ),
13        Status.Info(msg="An info message"),
14    ]
15)
16print(ft)

Data with Labels
To add data to the text with a label, it’s recommended to use LabeledData.
LabeledData is a collection of typed objects that can be used to display data in a frame.
Each class of LabeledData has the following base parameters:
label: A label to assign to the textvalue: The value to displayquotes: Whether to add quotes around the value
Added in version 2026.05.15.14.30: Added LabeledData.Date
Added in version 2026.05.21.16.30:
Added
LabeledData.BytesChanged default colors for
LabeledData.NumberandLabeledData.Date
Changed in version 2026.04.03.16.00: Used to be color and attrs.
Added in version 2026.04.03.16.00:
Added in version 2026.05.03.14.45:
no_colon: If true, the colon will be omitted from the text. Overridescolon_match
LabeledData classes using colon_match 1ft: FramedText = FramedText(
2text=[
3 LabeledData.String(
4 label="LabeledData.String",
5 value="A String value",
6 no_colon=True
7 ),
8 LabeledData.Number(
9 label="LabeledData.Number",
10 value=3.14159,
11 no_colon=True
12 ),
13 LabeledData.Boolean(
14 label="LabeledData.Boolean",
15 value=True,
16 no_colon=True
17 ),
18 LabeledData.Path(
19 label="LabeledData.Path",
20 value=Path("/path/to/a/file.txt"),
21 no_colon=True
22 ),
23 LabeledData.Date(
24 label="LabeledData.Date",
25 no_colon=True
26 ),
27 LabeledData.Bytes(
28 label="LabeledData.Bytes",
29 value=65535,
30 no_colon=True
31 ),
32 ]
33)
34print(ft)

Added suffix support to each type of
LabeledData. Suffixes will appear after the value. The following parameters apply to the suffix:
suffix: Optional text to appear after the value
suffix_color: The color for the suffix [1].
suffix_attrs: The attribute(s) for the suffix [2].Note
The cut-off mode for suffixes is always
"word". See mode for more information.AllLabeledDataclasses with suffixes1ft: FramedText = FramedText( 2text=[ 3 LabeledData.String( 4 label="LabeledData.String", 5 value="A String value", 6 suffix="with a suffix" 7 ), 8 LabeledData.Number( 9 label="LabeledData.Number", 10 value=3.14159, 11 suffix="with a suffix" 12 ), 13 LabeledData.Boolean( 14 label="LabeledData.Boolean", 15 value=True, 16 suffix="with a suffix" 17 ), 18 LabeledData.Path( 19 label="LabeledData.Path", 20 value=Path("/path/to/a/file.txt"), 21 suffix="with a suffix" 22 ), 23 LabeledData.Date( 24 label="LabeledData.Date", 25 suffix="with a suffix" 26 ), 27 LabeledData.Bytes( 28 label="LabeledData.Bytes", 29 value=65535, 30 suffix="with a suffix" 31 ), 32 ] 33) 34print(ft)
Below lists the classes with additional parameters or those that differ from the base parameters:
LabeledData.Numberround_to: Number of decimal places to round toleading_zeros: Number of leading zeros to addint_no_round: Whether to display the value as an integer without rounding
LabeledData.BooleanThis class splits
textandcoloracross seperate parameters for True and False values.t_text: Text to display when the value is Truef_text: Text to display when the value is Falset_color: Color to use when the value is Truef_color: Color to use when the value is False
LabeledData.Datestrftime: Date formatter for whenvalueis adatetimeobject orvalueis not passed
LabeledData.Bytesshow_unit: Whether to show the unit (e.g. “KiB”) and convert the bytes. If False, will show the raw bytes.unit_type:"iec"uses the IEC format (e.g. “KiB” -> Kibibytes),"si"uses the SI format (e.g. “KB” -> Kilobytes)unit_match: If True, the unit will match the styling of the value
The following LabeledData types are supported:
Class |
Supported Types |
|---|---|
|
|
|
|
|
|
|
|
|
|
|
Here is an example of using LabeledData to display a string value:
LabeledData class with FramedText1ft: FramedText = FramedText(
2 text=[
3 LabeledData.String(
4 label="LabeledData.String",
5 value="A String value",
6 )
7 ]
8)
9print(ft)


Ouptut of all of the LabeledData types printed together
Displaying Statuses
framed_text also features Status objects to display messages with a status icon.
Status takes the following parameters:
icon: The icon to displayicon_color: The color of the iconsep: The seperator between the icon and messagemsg: The message to displaytext_color: The color of the message
Added in version 2026.05.09.14.45:
overwrite: If true, will overwrite the previous line with the new status
The Status is constructed as: <icon><sep><message>
Changed in version 2026.04.04.14.00:
If the
iconis an empty string, the seperator will not be displayed.The Status will be constructed as:
<message>text_colorwill still be applied tomsg
The default Status format is: <I>: <message>
Below is a full list of each Status and their default output:
Added in version 2026.04.29.16.30: Added Status.Hidden
 1ft: FramedText = FramedText(
 2  title="Status",
 3  frame_color="red",
 4  text=[
 5    Status.Info(msg="This is an info message"),
 6    Status.Action(msg="This is an action message"),
 7    Status.Success(msg="This is a success message"),
 8    Status.Warn(msg="This is a warning message"),
 9    Status.Fail(msg="This is a fail message")
10
11    # You can omit the 'msg=' parameter and achieve the same result
12    Status.Hidden("This is a hidden message. It just makes the text darker.")
13  ]
14)
15print(ft)

Displaying a Header and Divider
FramedHeader is like FramedText, but it only displays a single line of the ‘frame’:
FramedHeader. Without arguments, this is effectively a divider.1fh: FramedHeader = FramedHeader()

Like FramedText, we can color the header:
1fh: FramedHeader = FramedHeader(
2  frame_color="red"
3)

Currently, this ‘header’ is more of a divider. To actually make it a header and add a title, we can add:
1fh: FramedHeader = FramedHeader(
2  title="Header",
3  frame_color="red"
4)

Changed in version 2026.06.18.15.00: attrs has been renamed to title_attrs
FramedHeader also supports the same title formatting as FramedText:
FramedText, but adapted for FramedHeader1fh: FramedHeader = FramedHeader(
2 title="Header",
3 frame_color="red",
4 title_color="green",
5 title_attrs=["bold", "underline"]
6)

Shortening Text
Added in version 2026.05.04.17.15: Added ShortenText
ShortenText allows for shortening a string to a specified length. The main parameters are:
text: The string to shortenlimit: The maximum length of the stringmode: The mode to use for shortening
By default, if no limit is provided, the string will be shortened to the width of the terminal using os.get_terminal_size().columns.
The mode behaves the same as FramedText’s mode parameter. See mode for more information.
The text parameter currently supports the following types:
strobjectsAny
LabeledDataobject [3]
ShortenText can be used on its own or in other classes, such as FramedText.
ShortenText used on its own1text: str = "This is a very long message that should be cut off at some point. Ideally, this should be cut off earlier than later."
2short_text = ShortenText(text=text)
3
4# Or for a direct str type:
5# short_text: str = ShortenText(text=text).__str__()
6# short_text: str = ShortenText(text=text).text_shorten
7
8print(short_text)
ShortenText used with FramedText. Notice the use of mode="word" 1line: str = "This is a very long message that should be cut off at some point. Ideally, this should be cut off earlier than later."
2text: list = [
3 ShortenText(text=line)
4]
5ft: FramedText = FramedText(
6 title="Shorten Text",
7 text=text,
8 frame_color="red",
9 mode="word"
10)
11print(ft)

str objects in the text list parameter of FramedText will use ShortenText to shorten strings, so no
need to use ShortenText directly on them!
 1text: list = [
 2    "This is a very long message that should be cut off at some point. Ideally, this should be cut off earlier than later."
 3]
 4ft: FramedText = FramedText(
 5    title="Shorten Text built-in to FramedText",
 6    text=text,
 7    frame_color="blue",
 8    mode="middle"
 9)
10print(ft)

Chaining Frames Together
Added in version 2026.06.24.15.15: Added FrameChain
Sometimes you want multiple FramedText objects to be displayed together, such
as a comparison between two of them.
This can be accomplished using FrameChain, which takes the following parameters:
frames: A list ofFramedTextobjects to display.layout: The layout to use for displaying the frames. Can be"vertical"or"horizontal".group_title: The title to use for the group (Entire chain). Leave empty for no title.show_titles: If True, will display each frame’s title. Otherwise, will not display titles, as iftitlewas blank inFramedText.g_title_color: The color to use for thegroup_title.g_title_attrs: The attributes to use for thegroup_title.
In addition, FrameChain shares the following parameters from FramedText:
cutoff_mode: Behaves the same as mode inFramedText.
Note
cutoff is forced enabled for FrameChain.
title_color: The color to use for each frame’s title.frame_color: The color to use for the frame.title_attrs: The attributes to use for each frame’s title.
Simple Implementation
To start off simple, let’s look at a simple implementation. We have 2 frames:
Frame A
1ft1: FramedText = FramedText(
2    title="Frame A",
3    text=Status.Info("This is an info message"),
4    frame_color="blue",
5)

Frame B
 1ft2: FramedText = FramedText(
 2    title="Frame B",
 3    text=[
 4        Status.Action("This is an action message"),
 5        LabeledData.String(label="Labeled String", value="An Example String"),
 6    ],
 7    frame_color="red",
 8    title_color="green",
 9    title_attrs=["bold"],
10)

These frames can be “chained” together with the following setup:
frames must be a list, even if only 1 frame is present. 1ft1: FramedText = FramedText(
2 title="Frame A",
3 text=Status.Info("This is an info message"),
4 frame_color="blue",
5)
6ft2: FramedText = FramedText(
7 title="Frame B",
8 text=[
9 Status.Action("This is an action message"),
10 LabeledData.String(label="Labeled String", value="An Example String"),
11 ],
12 frame_color="red",
13 title_color="green",
14 title_attrs=["bold"],
15)
16fc: FrameChain = FrameChain(
17 frames=[ft1, ft2],
18)
19print(fc)

The frames are displayed vertically. This is because layout defaults to "vertical".
Notice how Frame B lost its title formatting, and the frames are uncolored?
FrameChain unifies all frames under a single style, which by default, is uncolored.
Inheritance
FrameChain has a special parameter, inherit_from, which allows inheriting the
following parameters from the specified FramedText <framed_text.FramedText object if they are not specified:
title_colorframe_colortitle_attrsg_title_color: Derived fromtitle_colorg_title_attrs: Derived fromtitle_attrs
We can choose to inherit the styles from Frame B and apply it to the whole group:
inherit_from takes the whole FramedText object. 1ft1: FramedText = FramedText(
2 title="Frame A",
3 text=Status.Info("This is an info message"),
4 frame_color="blue",
5)
6ft2: FramedText = FramedText(
7 title="Frame B",
8 text=[
9 Status.Action("This is an action message"),
10 LabeledData.String(label="Labeled String", value="An Example String"),
11 ],
12 frame_color="red",
13 title_color="green",
14 title_attrs=["bold"],
15)
16fc: FrameChain = FrameChain(
17 frames=[ft1, ft2],
18 inherit_from=ft2,
19)
20print(fc)

We can even add a title for the whole group and style it differently to each frame’s title:
 1ft1: FramedText = FramedText(
 2    title="Frame A",
 3    text=Status.Info("This is an info message"),
 4    frame_color="blue",
 5)
 6ft2: FramedText = FramedText(
 7    title="Frame B",
 8    text=[
 9        Status.Action("This is an action message"),
10        LabeledData.String(label="Labeled String", value="An Example String"),
11    ],
12    frame_color="red",
13    title_color="green",
14    title_attrs=["bold"],
15)
16fc: FrameChain = FrameChain(
17    frames=[ft1, ft2],
18    inherit_from=ft2,
19    group_title="Frame Chain",
20    g_title_color="yellow",
21)
22print(fc)

Side-By-Side Chain (Horizontal Layout)
If you want each frame to be displayed side-by-side (such as a diff), you can set the layout to "horizontal".
This comes with its own parameter: columns, which specifies the number of columns to use. If left blank,
the number of columns used will be dyanmically calculated based on the following formula:
The horizontal layout looks like this:
 1ft1: FramedText = FramedText(
 2    title="Frame A",
 3    text=Status.Info("This is an info message"),
 4    frame_color="blue",
 5)
 6ft2: FramedText = FramedText(
 7    title="Frame B",
 8    text=[
 9        Status.Action("This is an action message"),
10        LabeledData.String(label="Labeled String", value="An Example String"),
11    ],
12    frame_color="red",
13    title_color="green",
14    title_attrs=["bold"],
15)
16fc: FrameChain = FrameChain(
17    frames=[ft1, ft2],
18    inherit_from=ft2,
19    layout="horizontal",
20    group_title="Frame Chain",
21    g_title_color="yellow",
22)
23print(fc)

Notice the extra line in Frame A, which was caused by Frame B having 2 lines of text.
Creating a Progress Bar
Added in version 2026.05.09.14.45: Added ProgressBar
Progress bars can be created using the ProgressBar class. This will create a progress bar that snaps to the
bottom of the terminal. It will look something like this:
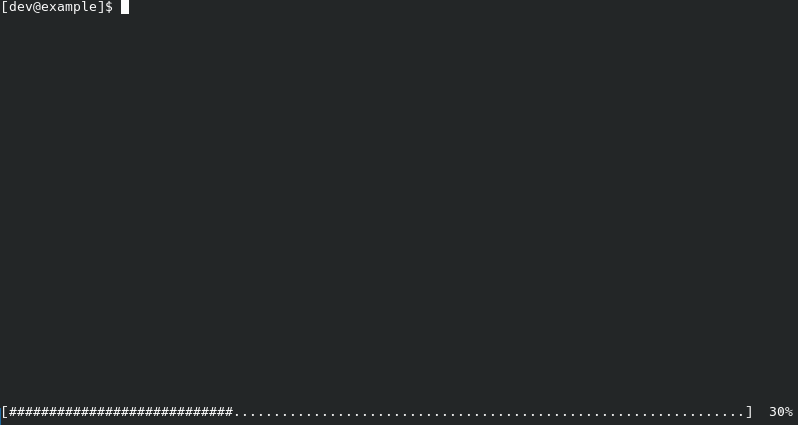
A basic progress bar with value=3 and total=10
ProgressBar takes a few parameters, however not all of them are required.
Required Parameters
value: The current valuetotal: The total value
Data Parameters
show_percent: If true, will display the percentage of the progress bar (value / total)show_values: If true, will display the current value and total value formatted as"<value>/<total>"
Customization Parameters
label: A text label for the progress barshow_frame: If true, will display a frame around the progress bar, just likeFramedTextprogress_icon: The icon to use for the progress barempty_icon: The icon to use for the empty space in the progress barbrackets: The brackets to use for the progress bar. The input is formatted as(<left>, <right>)
Color Parameters [1]
value_color: Color of the labellabel_color: Color of the labelpercent_color: Color of the percentageprogress_color: Color of the progress displaybrackets_color: Color of the bracketsframe_color: Color of the frame
Other Parameters
safe_mode: If true, will clear the terminal and move cursor to top to ensure room for progress bar and any other data.skip_init: If true, will only initialize whendisplayorupdate_progressis called
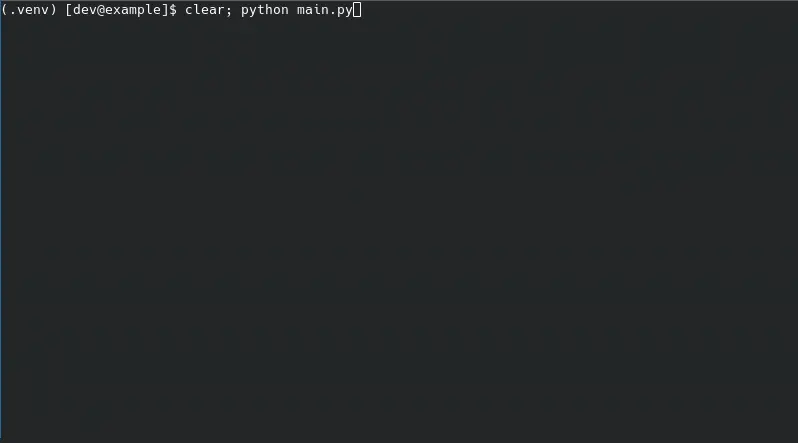
The Basics of Creating a Progress Bar
The basic setup for a working progress bar looks something like this:
 1from time import sleep
 2try:
 3    val = 0
 4    total = 100
 5    pb: ProgressBar = ProgressBar(
 6        value=val,
 7        total=total,
 8    )
 9    # Loop can iterate over anything
10    for i in range(total):
11        # This is where code for doing stuff goes
12        # ...
13        # Update the progress
14        pb.update_progress(value=i+1)
15        sleep(0.1)
16    pb.reset()
17except (EOFError, KeyboardInterrupt):
18    ProgressBar.force_reset(show_frame=False, label=False)
This is a lot, so let’s break it down:
First, we define our
ProgressBar. Here, we are just passing values to thevalueandtotalparameters.Next, we loop over the total value and update the value of the progress bar with
i+1. This will increment the progress bar by 1.After the loop, we call
resetto reset the terminal back to the state before the progress bar was displayed. We have to do this otherwise we won’t be able to reach the bottom lines of our terminal.
Now, the try-except block is in case there is an error in the program while the progress bar is running. Without it, we would have the same issue as if we omitted the pb.reset() call.
The (EOFError, KeyboardInterrupt) used are for demonstration, but you can use any exception you want.
Warning
The parameters for ProgressBar.force_reset MUST match the parameters for ProgressBar. Otherwise,
unexpected results may occur.
The 2 parameters needed are:
show_frame: Same asProgressBarlabel: Set this toTrueif a label was used for theProgressBar. Otherwise, leave itFalse
A more advanced example looks something like this:
ProgressBar.force_reset matches the params in pb 1from time import sleep
2try:
3 val = 0
4 total = 50
5 print(Status.Action("Batch processing information..."))
6 pb: ProgressBar = ProgressBar(
7 value=val,
8 total=total,
9 label="Test Progress Bar",
10 show_percent=True,
11 show_frame=True,
12 frame_color="blue",
13 progress_icon='|',
14 empty_icon=' ',
15 )
16 for i in range(total):
17 print(Status.Hidden(icon='>>', msg=f"Processing file-{i+1}.txt..."))
18 pb.update_progress(value=i+1)
19 sleep(0.1)
20 print(Status.Hidden(icon='>>', msg=f"Processed file-{i+1}.txt", overwrite=True))
21 pb.reset()
22 print(Status.Success("Batch processing complete!"))
23except (EOFError, KeyboardInterrupt):
24 ProgressBar.force_reset(show_frame=True, label=True)
Here, we are printing a status message each iteration. These print statements will not overwrite the progress bar
as when ProgressBar is initialized, it will change the scrollable region of the terminal to exclude the progress bar.
We also customized the appearance of the progress bar, so it now looks something like this:

A full run of the above example looks like this:
Important Notes
ProgressBar is designed to be used on its own, not in any other class within framed_text.
Additionally, it is important to call reset on the progress bar when you are done with it. Not doing so may lead to unexpected behavior.
Currently, the progress bar does not handle resizing of the terminal window. Avoid resizing the window while the progress bar is running.
Creating a Spinner
Added in version 2026.05.12.17.00: Added Spinner class
Changed in version 2026.06.18.15.00: done_icon now supports StatusIcons
Spinners are similar to progress bars, but don’t show any information by themselves. However, the Spinner class can accept
text to display next to the spinner.
Spinner takes the following parameters:
text: Text to display next to the spinner. Omit for no text.icons_id: ID string of one of the built-in icon sets.done_icon: Icon to use for when the spinner is complete.custom_icons: A list of strings to use as the spinner icon. Overridesicons_idinterval: The delay between spinner icon updates.position: Where the spinner should be placed on a line.indent: How many spaces the line should be indented.spinner_color: Color of the spinner icon while active. [1]done_color: Color for the spinner icon when stopped. [1]
Spinner.BUILTIN_ICONS contains all the spinner animations built into the library.
It’s formatted as <id>: <frames>, with the id being used for the icons_id parameter. Each string in the list
is one frame of the spinner animation.
The main functions of Spinner include:
start(): The main method of starting the spinner. It optionally takes atextparameter.stop(): Will preform the following actions:Stops the current spinner
Removes or replaces the spinner on the line
If a
done_iconwas provided OR one was set earlier, it will replace the spinner.If none was provided OR
done_iconwasn’t set earlier, the spinner will be removed.
Warning
Spinner.start() will hide the cursor until Spinner.stop() is called. To prevent cases where the cursor
remains invisible after force exiting the program, include Spinner.stop() in your try-except block as
shown in the examples below.
update(): Allows changing values of the spinner.
Note
The following are the only values that can be changed while the spinner is running:
done_icondone_colortext
Examples
A very simple spinner looks something like this:
1from time import sleep
2sp: Spinner = Spinner()
3try:
4    sp.start()
5    sleep(10)  # Some task here
6    sp.stop()
7except (EOFError, KeyboardInterrupt):
8    sp.stop()

Colors
Most classes in framed_text have parameters for termcolor colors.
The value can be either a termcolor color code or an (R, G, B) tuple, where each value is between 0 and 255.
For a full list of termcolor color codes, see termcolor’s Text Properties.
Added in version 2026.06.09.14.15: Added Color class.
Other color models are now supported through the Color class.
The following are currently supported:
RGB:
rgbHEX:
hexHSL:
hslHSV:
hsv
Note
Each color model has set ranges for their values:
RGB: Given
(r, g, b):(0, 0, 0) <= (r, g, b) <= (255, 255, 255)HEX: Given
#rrggbb:#000000 <= #rrggbb <= #ffffffHSL:
0 <= h <= 360,0 <= s <= 1, and0 <= l <= 1HSV:
0 <= h <= 360,0 <= s <= 1, and0 <= v <= 1
Pass a color in either as a string (e.g. HEX, termcolor color) or a tuple (e.g. RGB, HSL):
 1ft: FramedText = FramedText(
 2    title="Color Demonstration",
 3    frame_color=Color("#A1B2F3", mode="hex"),
 4    text=[
 5        LabeledData.String(
 6            label="Red Label",
 7            value="Cyan value",
 8            suffix="with an orange suffix!",
 9            label_color=Color("#FF7777", mode="hex"),
10            val_color=Color((180, 1, 0.5), mode="hsl"),
11            suffix_color=Color((35, 1, 1), "hsv")       # Mode param name is optional
12        )
13    ]
14)
15print(ft)

Attributes
Attention
Not all of termcolor’s attributes are supported by every terminal emulator or operating system.
Your milage may vary
Most classes in framed_text have parameters for termcolor attributes.
All termcolor attributes are supported. Below is a list of all valid attributes currently available:
bolddarkitalicunderlineblinkreverseconcealedstrike

Showcase of all attributes using FramedText and LabeledData.String